If your device only has USB-C ports (any modern iPad, iPhone 15 or newer, almost every MacBook sold since 2016, every Chromebook, every recent Android phone) and you want to 3D print, you've probably hit the same wall as everyone else: you can slice a model in a browser, but you can't figure out how to actually get the file onto the printer. This guide walks through the workflow we use and the one cheap piece of hardware that bridges the gap - a dual USB-C plus USB-A thumb drive.
The short version: you can print from iPad to 3D printer (or from a MacBook, Chromebook, or Android phone) using a single object. Slice in the SimplyPrint cloud slicer, save the file to a dual-ended thumb drive plugged into the USB-C end, then flip the drive around and plug the USB-A end straight into the printer. The drive is the bridge that everyone forgets exists.
Why this workflow exists
Modern devices have been dropping the full-size USB port for years now. The iPad Pro went USB-C back in 2018; the rest of the iPad lineup has followed since. iPhones got USB-C with the 15. MacBooks have been USB-C-only since 2016. Chromebooks and recent Android phones round it out. Meanwhile, most 3D printers are still happily reading files off a USB-A thumb drive or microSD card on the front panel, the same way they did a decade ago.
That gap is real. A teacher with a classroom of iPads can't just drop a sliced file onto a USB stick from the iPad, because there's no USB-A port to plug it into. A designer on a MacBook Air with two USB-C ports has the same problem. A hobbyist who bought a Bambu Lab A1 mini and only owns a Chromebook hits the same wall. The cloud slicer half of the workflow has been a solved problem for years (you can slice anything in a browser), but the file transfer half quietly got harder.
A lot of online advice points you at manufacturer apps, AirDrop tricks, network shares, or Raspberry Pi setups. Those work for some printers and some people, but they all add friction or hardware you didn't want in the first place. The simplest fix turns out to be a $10 USB stick.
What you need
You need three things:
- A SimplyPrint account (free). This gives you the cloud slicer that runs in any browser - iPad Safari, Chromebook Chrome, Android Firefox, whatever. The same slicer engines as desktop OrcaSlicer, PrusaSlicer, BambuStudio, ElegooSlicer, CrealityPrint and Cura, running on our servers.
- A dual USB-C plus USB-A thumb drive. Cheap, single piece of hardware. Saves files from any USB-C device on one end, plugs into any printer on the other.
- A 3D printer with a USB port. Almost every desktop FDM printer made since 2017 qualifies: Bambu Lab, Prusa, Creality, Anycubic, Elegoo, Voron builds, Sovol, Flashforge - they all read sliced files from a USB drive.
For the thumb drive, here is what we suggest:
- Best overall: SanDisk 128GB Ultra Dual Drive Go. Recognizable brand, swivel design that protects both connectors, USB 3.2 speeds, big enough that you will never have to clean it out. This is the one we link in the slicer's "How to print" dialog.
- Budget pick: 32GB Dual USB-C and USB-A Thumb Drive. Cheaper, 32 GB is still way more than you need for sliced files.
- Alternative: 32GB Dual USB-C and USB-A Memory Stick. Same idea, different vendor.
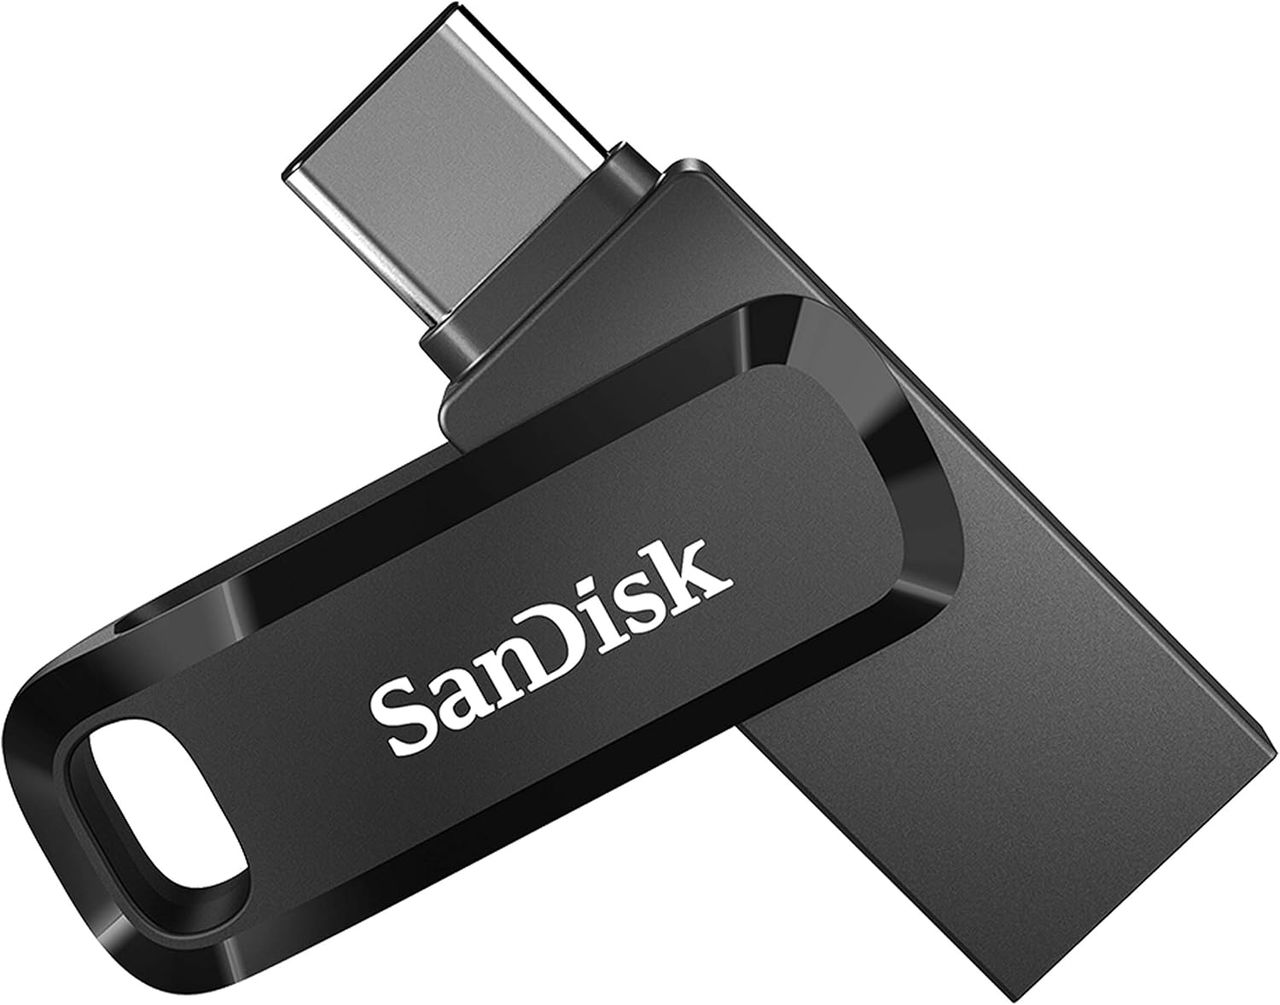
Storage size barely matters. A sliced file is 5 to 50 MB. The 32 GB drives fit hundreds of prints. Faster write speeds (USB 3.0 or newer) only save you a couple of seconds per file.
What about USB-C to USB-A adapters?
If you already own a regular USB-A thumb drive plus a USB-C to USB-A adapter, that combo also works - you can plug the adapter into your iPad or MacBook, write the file to the stick, then remove the adapter and plug the stick into the printer. We don't object. The reason we recommend the dual-ended drive instead is that it's one piece of hardware to carry, label, and not lose, where the adapter approach is two. If you bring a 3D-printed part to a school, an office, or a friend's house, "the USB stick" is easier to hand someone than "the USB stick and the adapter, which I think is in the same drawer".
Step-by-step: iPad and iPhone
Apple added native USB drive support to iPadOS and iOS 13, so this works on any iPad or iPhone made in the last five years.
- Open
simplyprint.io/slicerin Safari on the iPad or iPhone. - Drag in or upload your STL or 3MF model.
- Pick the printer profile, set the filament, slice the model.
- Plug the dual drive into the iPad's USB-C port (or your iPhone's USB-C port - iPhone 15 and newer).
- In the slicer, tap Save or Download. iOS opens the file picker.
- Choose the drive as the save location (it shows up in the Files app sidebar as an external device).
- Long-press the drive in Files and tap Eject. Do not skip this.
- Flip the drive to the USB-A end. Plug it into the printer.
- Start the print from the printer's screen.
The whole flow takes about 30 seconds once you have done it once. On iPad it really does feel like the way it should always have worked.
Step-by-step: MacBook (or any USB-C-only laptop)
If you work on a MacBook Air, MacBook Pro 14-inch or 16-inch (all of which are USB-C / Thunderbolt only), or a modern Windows or Linux laptop with no USB-A port, the workflow is the same as iPad - just with Finder or Windows Explorer doing the file move.
- Open
simplyprint.io/slicerin your browser. Safari, Chrome, Firefox, Edge - any modern browser works. - Upload your STL or 3MF model, set the printer profile, slice it.
- Plug the dual drive into one of the MacBook's USB-C ports.
- Download the sliced file. It lands in Downloads by default.
- Open Finder (or Windows Explorer). Drag the file from Downloads to the drive, which appears in the sidebar under Locations.
- Right-click the drive in the sidebar and pick Eject.
- Flip the drive to the USB-A end and plug it into the printer.
- Start the print from the printer's screen.
If your laptop still has a USB-A port (older MacBooks pre-2016, most Windows laptops with full-size USB), you don't need the dual drive at all - any regular USB stick works. The dual drive is specifically for the no-USB-A scenario.
Step-by-step: Chromebook
Chromebooks have full USB-C support and a real file manager, which makes this even smoother than iPad.
- Open
simplyprint.io/slicerin Chrome on the Chromebook. - Upload your file, slice it as normal.
- Plug the drive into the Chromebook's USB-C port.
- Download the sliced file. It lands in Downloads by default.
- Open the Files app on the Chromebook.
- Drag the file from Downloads to the drive (it appears in the sidebar with its volume name).
- Right-click the drive in the sidebar and pick Eject device.
- Flip to USB-A and plug it into the printer.
- Start the print.
This is what we recommend for school IT departments that issue Chromebooks to students. No Linux container, no installations, no admin approvals needed. We cover the deeper Chromebook slicing setup in how to slice on a Chromebook with OrcaSlicer or PrusaSlicer.
Step-by-step: Android
Android phones with USB-C all support external drives - usually you need to grant the file manager permission the first time.
- Open the SimplyPrint slicer in your phone's browser (Chrome, Firefox, or any modern browser works).
- Slice your model.
- Plug the dual drive into the phone's USB-C port. Android typically shows a notification - tap it to mount the drive.
- Download the sliced file.
- Open the Files app (or your phone's built-in file manager).
- Move the file from your phone's storage to the drive.
- Long-press the drive and tap Eject (or pull down the notification and tap Eject).
- Flip to USB-A, plug into the printer, start the print.
If the drive does not show up at all, your phone may not support USB OTG (host mode). This is extremely rare on phones made in the last five years, but if you bought a budget phone the spec sheet is worth checking.
Does this work with a Bambu Lab printer without a Raspberry Pi?
Yes. This is honestly one of the most common reasons people end up here.
Bambu Lab printers (X1C, X1E, P1S, P1P, A1, A1 mini, H2D) all have a USB port on the front and read sliced 3MF files off it natively. No Bambu Connect on a separate computer, no Raspberry Pi, and the printer doesn't even have to be connected to SimplyPrint for this to work.
The trade-off is that you lose the cloud-side conveniences: no remote monitoring, no queue, no AI Failure Detection, no automatic resume. If you want those, you eventually want a small host computer running OctoPrint or a similar bridge so SimplyPrint can talk to the printer directly. But for getting started on iPad or Chromebook, the dual-USB-C drive is the fastest path.
Limits and gotchas
A few things to keep in mind:
- File system. Most printers want FAT32 or exFAT. Drives bought new usually ship in one of those formats, but if your printer "can't see the file", reformat the drive on a borrowed computer (or ask a friend) to FAT32.
- Filename length. Some older printers truncate filenames longer than 30 characters or choke on special characters. Keep names short and ASCII-only.
- Eject properly. Yanking the drive without ejecting is the most common cause of "file is corrupt" errors on the printer side. Just always eject.
- One file at a time. If your printer's menu is slow, a drive full of old files makes browsing painful. Clear it occasionally.
- File format. Save as
.gcode,.bgcode(Prusa) or.3mf(Bambu) depending on what your printer expects. SimplyPrint's slicer picks the right format automatically based on the printer profile.
Putting it all together
If your only device is an iPad, iPhone, MacBook, Chromebook or Android phone, you can still own a 3D printer and run it properly. Cloud slicing has been a solved problem for years. The dual-ended drive is the missing piece that closes the loop, and it costs about ten bucks. That's the whole setup for hobbyists, students, or anyone who doesn't feel like maintaining a dedicated print-host computer.
Grab a free SimplyPrint account and one of the dual drives above and you're up and running. If you ever want full cloud integration later (remote start, queue, AI Failure Detection), a Raspberry Pi or any spare small computer covers that, and our printer setup guides walk through it. None of it is needed to start printing today.