Teaching 3D printing works best as a progression, not a single lesson. Students learn to design a simple part, then learn what a slicer does to it, then learn how to behave around a shared machine, then make one supervised print, and only then print on their own. Each step is short, and each one is something a student can show you they have understood before moving on.
This guide lays out that progression as a practical 3D printing curriculum. It covers what to teach at each stage, how to assess it, project ideas by age band, and how to run a class of 25 students on two to four printers without the printers becoming the bottleneck. It also covers the part most lesson plans skip: how students earn access to the printers, step by step. If you are still deciding whether your school should run 3D printing at all, start with 3D printing in schools and come back here when the printers are on the way.
Why is teaching 3D printing a progression?
Most 3D printing lesson plans jump from "open the design tool" to "print it". That works for one student and one printer. It breaks with a whole class, for three reasons.
- The printer is the scarcest resource in the room. A class of 25 shares a handful of machines. If students print before they understand print time, a few long jobs block everyone else for days.
- Failed prints teach less than you would hope. A print that detaches from the bed after two hours mostly teaches frustration. A student who has already seen the layers in a slicer preview can predict the failure and fix it first.
- Safety and etiquette need to come before independence. A shared machine has hot parts, moving parts and other people's work on it. Students need the rules before they get the access.
A progression solves all three. Every student gets a finished print early, because the first projects are small. Long or risky jobs only appear once students can judge them. And independence is something a student earns, not something handed to the whole class on day one.
What does a 3D printing curriculum look like?
A workable 3D printing curriculum has five stages. Each has a clear goal and a simple check that tells you the student is ready for the next one.
| Stage | What students learn | How you know they are ready |
|---|---|---|
| 1. Design basics | Place, size, combine and subtract shapes; export a model | They export a part that fits a given size limit |
| 2. Understanding slicing | Layers, supports, infill, orientation, print time | They predict print time and supports before slicing, then compare |
| 3. Printer etiquette and safety | Hot and moving parts, what not to touch, how the queue works | They pass a short safety check |
| 4. First supervised print | Submitting a job, watching the first layer, removing a print | One successful print with the teacher present |
| 5. Independent printing | Submitting within a time budget, handling failures | Consistent, sensible submissions |
The stages are cumulative, not time-boxed. A fast student can move through the first three stages in a week. A student who struggles with slicing stays at stage 2 until the ideas click. The rest of this guide walks through each stage.
Stage 1: design basics in a browser
Start with design, because that is where students are creative and where no printer time is used. A browser-based tool keeps the setup simple. Tinkercad is the usual choice in schools because it runs on Chromebooks and school laptops with nothing to install, and it has its own classroom tools for teachers.
The goal of stage 1 is not a beautiful model. It is a student who can:
- place, resize and align basic shapes,
- combine shapes and use one shape to cut a hole in another,
- measure in millimetres and keep a part inside a size limit,
- export the finished model.
Give the first brief a hard constraint, such as "a name tag no larger than 60 by 30 mm and no thicker than 4 mm". Constraints teach more than open briefs, and a small, flat part will print quickly and reliably later. If your students use Tinkercad, the Tinkercad classroom guide covers how their designs get from the export button into a shared print queue.
Stage 2: understanding slicing
Slicing is the lesson that turns students from "people who press print" into people who understand the machine. A slicer converts a 3D model into the instructions a printer follows, layer by layer. Four ideas matter most:
- Layers. The printer builds the part as a stack of thin layers. Thinner layers look smoother but take longer.
- Supports. Overhangs and bridges that hang in mid-air need temporary support material underneath, which has to be removed afterwards.
- Infill. The inside of a part is mostly hollow, filled with a pattern. More infill means a stronger part, more material and more time.
- Print time. Every choice above changes how long the job takes. This is the number that matters most in a shared classroom.
The best slicing lesson is a prediction exercise. Before slicing, each student writes down how long they think their part will take and where it will need supports. Then they slice it, step through the layer preview, and compare. Then they change one setting, such as orientation or infill, and slice again. Students quickly see that laying a part flat can remove supports entirely, and that more infill costs more time and material.
Students need a slicer they can actually open for this. Desktop slicers need ChromeOS's Linux container, which is usually disabled on school-managed Chromebooks, which is why many schools use a browser-based slicer instead. SimplyPrint's cloud slicer runs in the browser, with the slicing itself done on SimplyPrint's servers, so a Chromebook can slice a model and step through the layer preview. It offers the OrcaSlicer, PrusaSlicer, BambuStudio, Cura and other engines. The Chromebook slicing guide covers the device side.
Stage 3: printer etiquette and safety
Before any student touches a printer, teach the rules of the room. Keep safety guidance conservative and specific to your equipment, and follow the manufacturer's instructions and your school's health and safety policy.
Topics most classrooms cover:
- Hot parts. The nozzle and the build plate get hot enough to burn. Students do not touch them during or just after a print.
- Moving parts. Hands stay out of the printer while it is running.
- Air quality. Melting plastic releases fine particles and gases. The US National Institute for Occupational Safety and Health (NIOSH) guide Approaches to Safe 3D Printing, written for schools, libraries and makerspaces, recommends ventilated enclosures, local exhaust ventilation and clear rules about who uses the printers. Read it before you choose where the printers go.
- Etiquette. Never remove or cancel someone else's print. Report a failed print instead of restarting it. Clear the plate only when you have been told to.
- What to do when something goes wrong. Who to tell, and what not to try to fix yourself.
Finish stage 3 with a short knowledge check, a handful of multiple-choice questions, rather than a signature on a sheet. A check tells you who has actually understood the rules.
Stage 4: the first supervised print
The first real print is a milestone. Keep it short and supervised. The student submits their stage 1 part, and you watch the first layer go down together. The first layer is where most prints succeed or fail. A student who has seen a good first layer, and a bad one, will recognise both later.
Use the print to teach three things:
- Submitting a job properly. The right printer, the right material and a sensible print time.
- Watching the first layer. Is it sticking? Is it squashed flat or rounded?
- Removing the print safely. Wait for the plate to cool if your printer requires it, and use the tool you have provided.
If the print fails, that is a good lesson too, as long as the student can say why. Ask them to connect the failure back to what they saw in the slicer.
Stage 5: independent printing
Independent printing does not mean unsupervised chaos. It means the student can submit jobs on their own, within rules you have set, and you review the queue instead of standing at the printer. At this stage students should:
- submit to the shared queue without help,
- stay inside their print-time budget,
- re-slice a job when you send it back with feedback,
- recognise a failed print and report it.
Many teachers keep an approval step even for independent students, and relax it only for students who have a track record. The next sections cover how to run that approval step, and how students can earn access automatically.
How do you assess 3D printing?
Assess understanding and process, not just the finished object. A beautiful print from a student who got lucky with the settings shows less learning than an honest failure analysis. Assessment ideas that fit each stage:
| Stage | Assessment idea |
|---|---|
| Design basics | Design to a brief with measurable constraints: size, wall thickness, a hole that fits a given pin |
| Slicing | Prediction sheet: estimated time and supports before slicing, actual values after, and an explanation of the difference |
| Safety | A short multiple-choice knowledge check that must be passed before printing |
| First print | First-layer observation: what did you see and what does it tell you? |
| Independent work | Design journal with iterations, including at least one failed or revised print and what changed |
| Final project | Peer review against the original brief, plus a reflection on print time and material used |
A design journal is the single most useful tool. It captures sketches, screenshots of the slicer preview, photos of failed prints and the changes made. It also gives you evidence of learning that does not depend on how well the printer behaved that week.
3D printing projects for students, by age band
Good 3D printing projects for students start small and flat, then add function and constraints as students grow. These are vendor-neutral ideas that fit most FDM printers and design tools.
| Age band | Project ideas | What they teach |
|---|---|---|
| Upper primary (about 8 to 11) | Name tags, keychains, bookmarks, simple geometric solids for maths | Placing shapes, measuring, text on a surface |
| Lower secondary (about 11 to 14) | Phone stand, cable clip, spinning top, a board-game piece, a desk organiser | Balance, tolerance, orientation and supports |
| Upper secondary (about 14 to 18) | Snap-fit box, gear pair, a fix for something broken at school, a device designed for a specific user's needs | Tolerances, iteration, design for a real user |
| College and university | Parametric parts, tolerance test prints, orientation strength tests, prototypes for a lab or club | Engineering trade-offs, documentation, testing |
Two tips make almost any project work better. First, give a print-time limit in the brief, not only a size limit. It forces students to think about infill and orientation. Second, prefer projects with a real user or a real problem. A cable clip that actually holds the cables behind the teacher's desk teaches more than a generic ornament.
How do you run a class of 25 with two to four printers?
Classroom logistics are where most school 3D printing programmes struggle. Do the maths first. If 25 students each print one 45-minute part, that is almost 19 hours of printer time. On three printers, that is more than six hours of printing before counting failed prints and reprints. A single lesson is nowhere near enough, so the printing has to happen in the background, through a queue.
What works in practice:
- One shared queue. Students submit jobs to a queue instead of carrying files to a printer. The printers work through it during lessons, breaks and after school.
- Teacher approval. New students' jobs wait for a teacher to check them before they reach a printer. This catches the 14-hour print and the part that will never stick to the bed.
- Time budgets. Give each student a print-time or print-count allowance per unit or term. Students learn to value printer time when it is visibly limited.
- Short first projects. Keep stage 1 and stage 4 parts under an hour so the whole class can print in the same week.
- Clear ownership. Every print on the plate should show whose it is, so finished work reaches the right student.
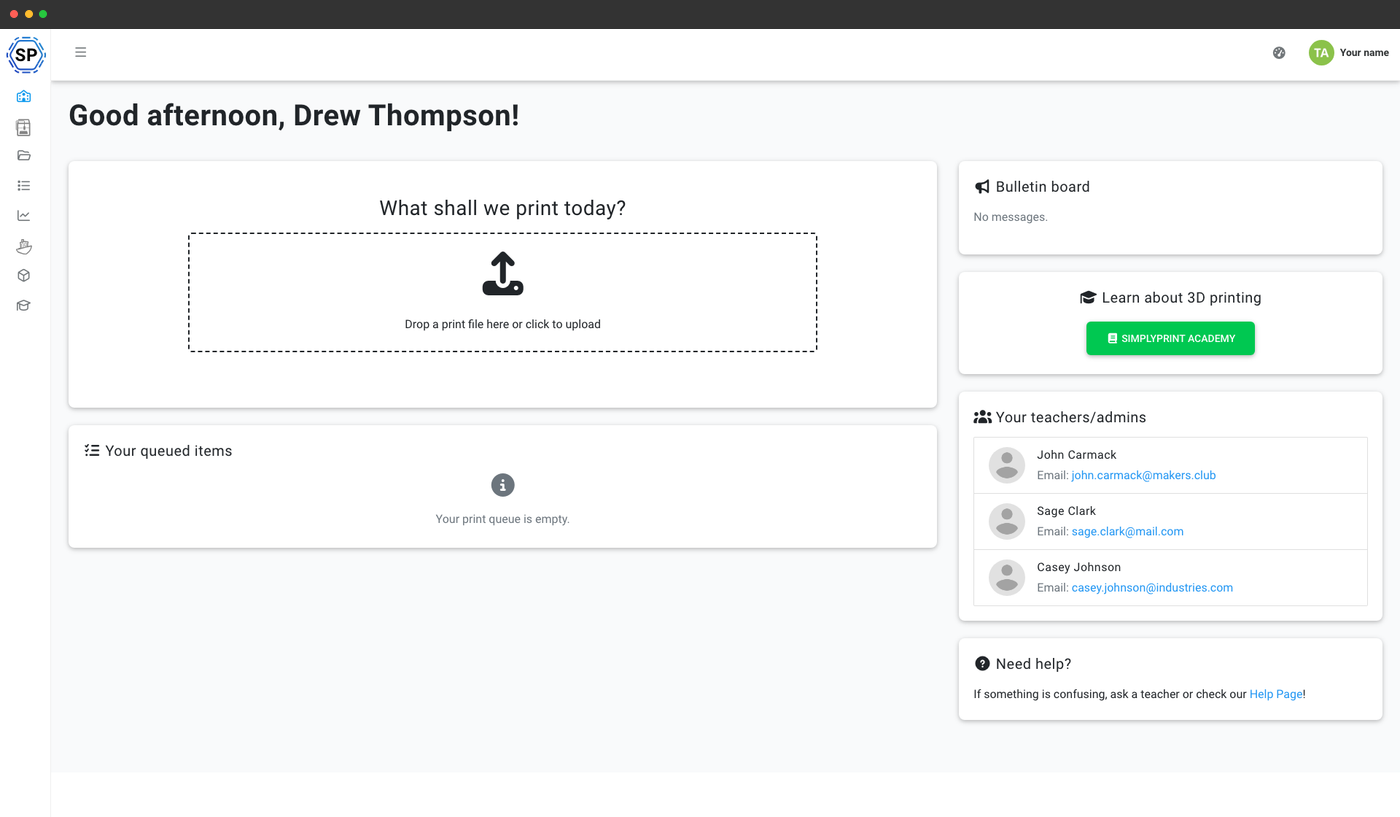
SimplyPrint is built around this workflow. Students add jobs to a shared print queue, and with print approval on the Education plan, a submission waits in a pending state until a teacher approves it, denies it, or sends it back for revision. Quotas set per-student limits on prints, print time, material and more. Allowances can reset daily, weekly, monthly or per semester, following the terms you define in your school settings. Students who run out can request more, and teachers decide. Everything runs in the browser, so students submit from the same Chromebooks they design on.
How can students earn access to the printers?
Earned access is the idea that ties the whole progression together. Instead of the teacher unlocking the printer for the whole class on a set date, each student unlocks the next step by showing they are ready. It rewards the students who put the work in, and it stops a student who skipped the safety lesson from starting a print.
A simple ladder looks like this:
- Safety course passed: the student can add jobs to the queue.
- Slicing course passed: the student can use the slicer themselves.
- A set number of prints: the student can start prints directly, with or without approval.
SimplyPrint can enforce this ladder automatically on the Education plan, using feature unlocks tied to the Academy. The Academy is SimplyPrint's built-in course player, with a public course library every account can read. On the Education plan, teachers can also author their own slide-based courses with images, embedded videos and multiple-choice quiz questions, and add teacher notes that only teachers see.
A teacher or admin then creates a feature unlock. It locks features such as starting a print, the slicer or the queue until a student has completed the chosen courses. The unlock can also depend on how many days the student has been in the account or how many prints they have made. You can require all of these conditions or any one of them. On completion, SimplyPrint can unlock the features, move the student up to a higher user group, or add them to a school class. Feature unlocks can apply to specific groups or classes only, and teachers are exempt by default.
Academy pour les écoles
Programme d’enseignement de l’impression 3D, cours de sécurité obligatoires et apprentissage au rythme de l’élève, intégrés à l’interface que les enseignants utilisent déjà
The result is a classroom where the progression in this guide is enforced by the system, not by a teacher checking a spreadsheet. Students see what they need to do next. Teachers see who has finished which course, and spend their time reviewing designs rather than policing the printer.
Where to start next week
You do not need the whole curriculum in place to begin teaching 3D printing. A realistic first week:
- Run a stage 1 design lesson with a tight brief, such as a name tag with a size limit.
- Run a stage 2 prediction exercise on the same part: estimate print time and supports, slice, compare.
- Write a one-page printer safety and etiquette sheet for your room, based on your manufacturer's instructions and the NIOSH guidance.
- Set up a shared queue so the class's first prints can run in the background.
Once that is working, add the knowledge check, the time budgets and the earned-access ladder. The education overview shows how SimplyPrint supports K-12 schools and colleges and universities, and the Education plan is free to try.