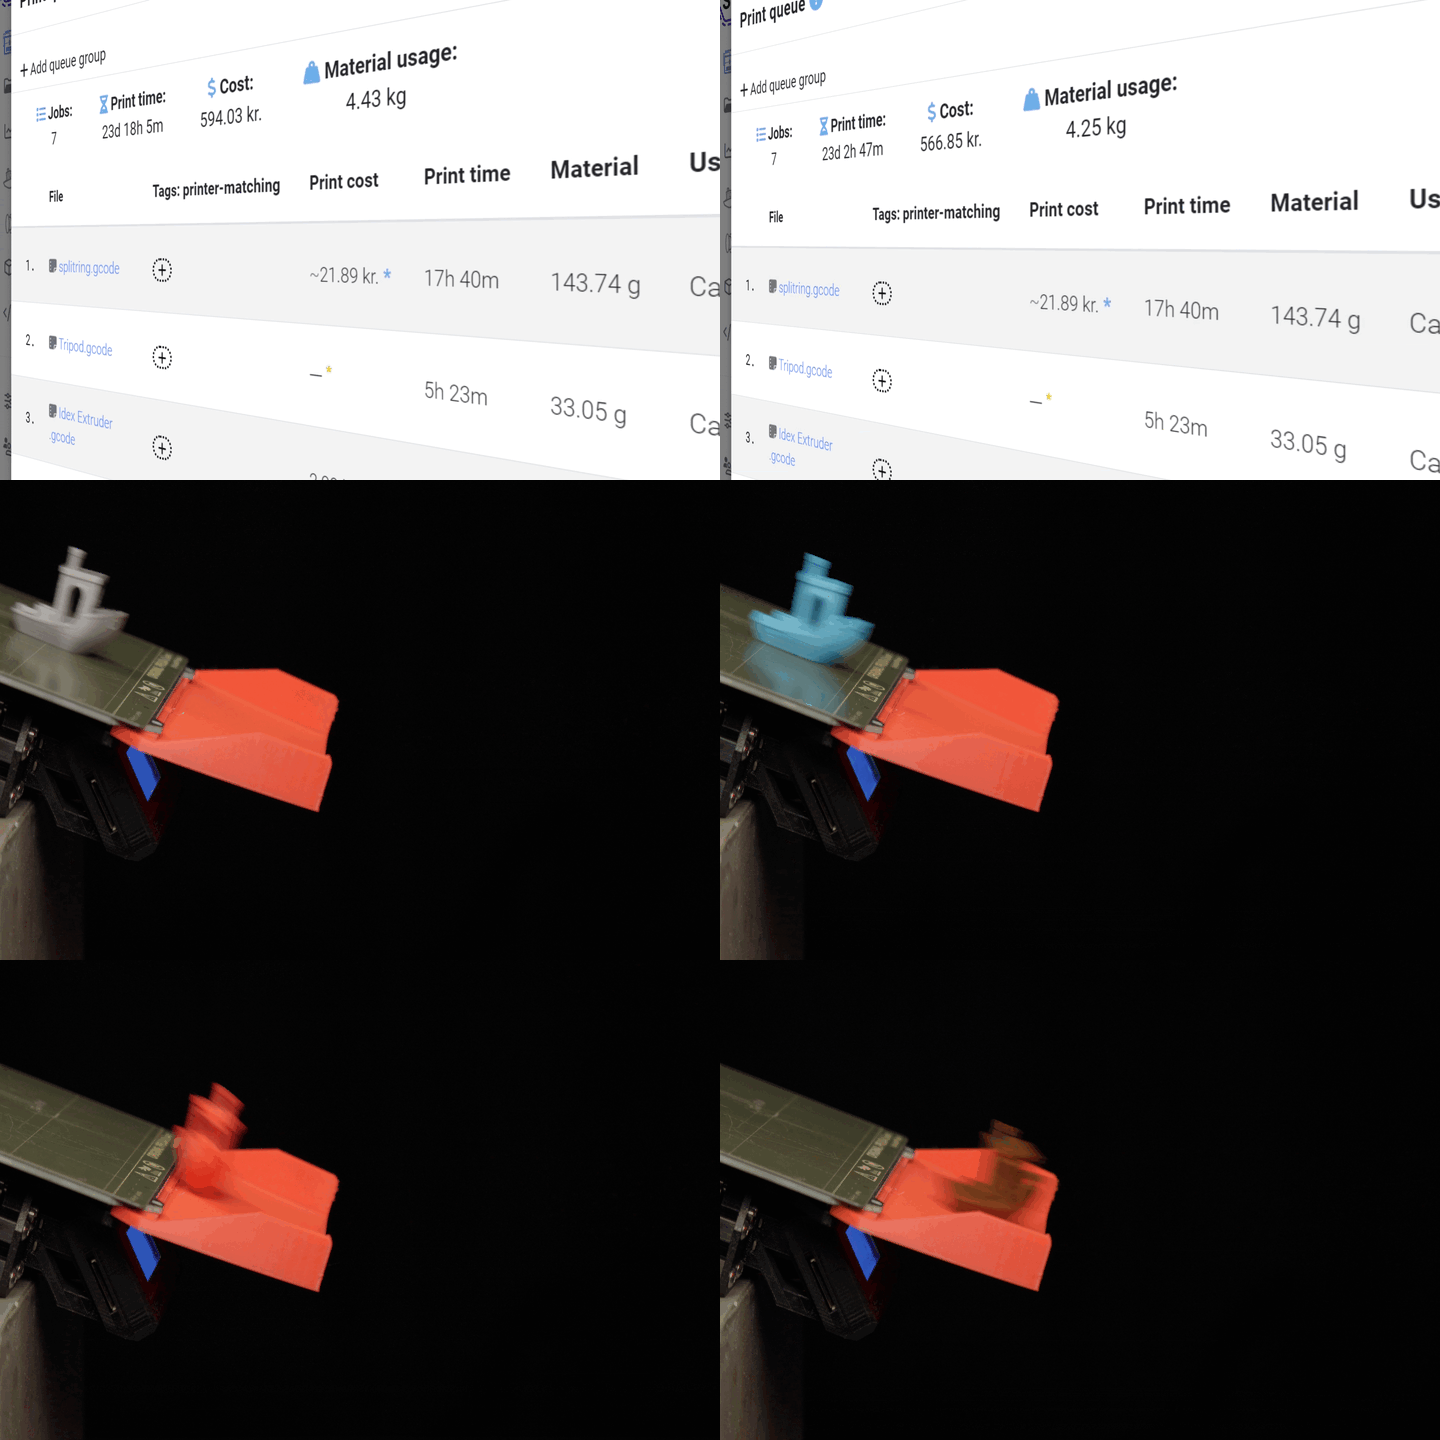
If you want to know how to continuously print with a 3D print farm, the short answer is that every printer needs to clear its own bed and pull the next job from a shared queue without a human in the loop. SimplyPrint's AutoPrint does that orchestration. It matches a queued file to a free, compatible printer. It dispatches the job. It runs a clearing routine when the print finishes (toolhead push-off, plate switch, belt advance, or robot arm). Then it pulls the next matching item. The result is continuous 3D printing across a print farm that runs overnight, weekends, and holidays.
This guide walks through what "continuous" actually means once you have more than one printer. It covers the four automatic bed clearing 3D printer methods AutoPrint supports today, what your queue needs to look like for matching, and what fails first when a farm runs unattended. By the end you will have a clear picture of the 3D print farm automation stack required to put a farm on autopilot.
How to continuously print with a 3D print farm in practice
You set up a shared queue of print jobs. You tag each job with its constraints (printer model, nozzle size, filament type, plate type). You enable AutoPrint on each printer in the farm. You configure each printer's preferred clearing method. From there, the queue matches every free printer to the next compatible job. It dispatches the job, and triggers a clearing routine when the job finishes. The printer goes straight back to "ready" and pulls the next job. That is the entire AutoPrint 3D printer loop.
If you have already tried OctoPrint's "Continuous Print" plugin, or a one-printer belt setup, and found that it does not scale past a single printer or a single job type, that is the gap this guide closes. A real farm runs many printers, many jobs, and many filaments at the same time. The orchestration layer above the hardware is what makes 24/7 3D printing work, not the hardware itself.
AutoPrint™
Dine printere på autopilot
What "continuous" actually means in a print farm
On a single printer, "continuous" usually means "print one queued file after another without re-uploading anything". That is easy: any plugin or panel that can start a fresh job after the last one finishes is good enough.
On a farm with five, fifty, or five hundred printers, the bar is much higher. You need:
- A shared queue that every printer can pull from, not a per-printer print history.
- Compatibility matching between each queued job and each free printer, because not every printer can print every file (filament, nozzle, plate, build volume, machine type all matter).
- Bed clearing that happens without an operator, so a printer that finishes at 03:00 does not sit idle until someone walks in.
- Failure handling that takes a printer out of rotation when something goes wrong, instead of cheerfully sending the next job into a failed state.
AutoPrint is the layer that does all four. The queue is in /features/print-queue. Compatibility matching uses tags and file metadata (covered below). Bed clearing is what we go through in the next section. Failure handling is the section after that.
A simple FIFO queue (print whatever is next in line on whichever printer is free) does not survive contact with a real farm. The moment two queued jobs need different nozzle sizes, or one job is a multi-day part and the other is a 20-minute reprint, FIFO becomes a liability. Tag-matched queues stay sane at any farm size.
The four ways to clear the bed automatically
AutoPrint supports four clearing methods. Each maps to a different mechanical approach. You can run a mixed farm with one method per printer; the queue does not care.
1. Toolhead push-off
The printer's own toolhead pushes the finished, cooled print off the bed. No extra hardware required, no kit to install. AutoPrint waits for the bed to cool to a configured threshold, runs a clearing G-code routine (we ship a default for Cartesian printers with rectangular beds), and reports the bed as cleared.
This is the most common starting point because it works with what you already own. It does need testing: the print has to release cleanly from the bed at the chosen temperature, and the G-code needs to clear the prime line, skirt, or brim along with the part itself, or the next print starts on top of residual filament.
2. Plate switching
A swap mechanism removes the finished plate from the printer and brings a fresh one into position. Several third-party mods do this today, and AutoPrint integrates with all of them. Partners we integrate with include swapmod, Innocube3D Swapmod, JobOx, and the Chitu PlateCycler family on small-format printers, plus larger plate carousels like 3D-Printomat, Printflow3D, AutoSwap, and AutoClear. Each handles plates a little differently (some lift, some slide, some pivot), but from the queue's point of view the printer goes from "finished" to "ready with a fresh plate" without an operator.
3. Belt printer
Belt printers (also called "infinite-Z" printers) have a conveyor belt as a build surface. When the print finishes, the belt simply advances, the printed part falls into a bin, and the printer is immediately ready for the next job. AutoPrint treats the belt as a special clearing method that needs no temperature wait and no G-code routine.
This is the closest to "truly continuous" because there is no cooldown step at all. The trade-off is that belt printers have a different slicing model (parts print at an angle, not flat to a bed), so the queue side has to know the printer is a belt to route belt-sliced files to it.
4. Robot arm
A robot arm reaches into the printer, lifts or pushes the finished part off the bed, and drops it into a collection bin or tote. Loop, FarmLoop, and the 3DQue Ejection Kit are examples of partners that ship arm-based or arm-adjacent solutions integrated with AutoPrint.
Robot-arm setups give the most flexibility (the same arm can handle several printers in a cell), but they are the most operationally complex. You pay for that flexibility in setup time and floor space; the upside is that one arm can keep four to six printers continuously fed.
What AutoPrint needs from your queue
Bed clearing is the easy half of continuous printing. The hard half is making sure the right job goes to the right printer, every time, without a human checking it. That is the queue's job, and the queue needs three things:
- Tags on every queue item. Tags carry the constraints a job has: required nozzle size, filament type and colour, plate type, printer model family, customer or order ID. AutoPrint reads tags when matching jobs to printers.
/features/tagscovers the tag system end-to-end. - File metadata that survives slicing. The slicer (whether SimplyPrint's cloud slicer, OrcaSlicer, PrusaSlicer, BambuStudio, ElegooSlicer, or CrealityPrint) writes filament type, nozzle, layer height, and estimated print time into the G-code or 3MF. AutoPrint reads that metadata and uses it in matching too. You do not have to tag every detail by hand; the file already knows.
- Printer groups for the farm. Group printers by capability (build volume, materials, plate type, location) so the queue can match jobs to a group rather than a single specific machine. Groups also make it easy to take a sub-set of printers offline without breaking the rest of the farm.
The combination of tags + file metadata + groups means a 50-printer farm can run jobs from 200 different orders, on three nozzle sizes and four filament types, without any of them landing on the wrong printer. That is the part the hardware vendors do not solve and the queue does.
What can go wrong, and how to keep it from cascading
The risk with any unattended farm is not the print that fails. It is the next ten prints the farm tries to put on top of the failed one. Three operational features keep failures contained:
Failure handling. A print that fails (operator-marked, printer-reported, or caught by AI failure detection) takes the printer out of AutoPrint rotation until someone confirms the bed is clear. AutoPrint does not dispatch the next job to a printer it knows is in a bad state. Alerts feed through /features/notifications so the operator knows immediately, not the next morning.
Maintenance mode. Putting a printer in maintenance mode excludes it from AutoPrint and from queue matching entirely. That is the right move for scheduled servicing (nozzle changes, belt tensioning, calibration), for printers waiting on a spare part, or for any printer you do not trust to run unattended yet. /features/printer-maintenance covers the schedule triggers (by print hours, filament use, or failure rate) and the spare-parts inventory side.
Staggered start. When AutoPrint dispatches jobs to many printers at once (the obvious failure mode at shift start or after a power cut), every printer tries to heat its bed and hotend simultaneously. On a busy circuit, that trips a breaker. Staggered start spreads the heat-up across a configurable window so the farm comes up gracefully instead of crashing the wall. Read more at /features/staggered-start.
The honest answer to "can I leave the farm unattended?" depends on how many of these you have configured. With all three in place, a farm can run overnight and through a weekend with periodic check-ins. Without them, AutoPrint will happily turn one failed print into ten.
What continuous printing does not do yet
A few things in 2026 still need an operator in the loop, even on a well-configured farm. Worth being honest about:
- First print on a new printer. AutoPrint trusts a printer that has succeeded recently. A printer you just brought online, or one that has just had its build surface replaced, should run a manual job or two before you flip AutoPrint on. The default G-code clearing routine is tuned for typical Cartesian printers; if your bed has any oddity (a glass plate, a textured PEI, a non-standard size), test the clearing motion at low speed before unattended runs.
- Multi-material per print. AutoPrint dispatches a single job to a single printer. If the job itself needs filament swaps (paint-on multicolor, manual filament change, AMS lane switching mid-print), those happen inside the print and are not part of AutoPrint. Multi-material works fine as a per-job feature; it is just not what AutoPrint orchestrates.
- Physical part collection. Push-off and toolhead clearing drop parts in front of the printer. Without a collection bin, parts pile up and eventually block the bed. Belt printers, plate switchers, and robot arms solve this; toolhead push-off does not, by itself.
- Truly zero-touch hardware. Filament still runs out, beds still wear, prime nozzles still clog. AutoPrint does not extend the maintenance interval on the underlying hardware; it just means you can decide when to look, instead of being chained to the printer.
If you depend on any of those, plan for an operator pass once a day rather than expecting full lights-out. For most farms producing many small to medium parts, that is already an order of magnitude less labour than running printers by hand.
Where to go from here
Continuous printing is a stack, not a single feature. The bed-clearing hardware is the visible bit, but the queue, the tag system, maintenance mode, and staggered start are what turn that visible bit into a farm that runs without you. Pick the clearing method that fits the printers you already own, set up tags and groups so the queue can do real matching, and configure maintenance mode and staggered start before you let the farm run unattended overnight.
Running a school or makerspace instead of a production farm? The same queue and tag system is what powers shared classroom printer pools. See how to 3D print directly from Tinkercad on a Chromebook for the education-focused version of this workflow.
For a deeper tour of the AutoPrint feature itself (animations of each clearing method, the per-printer setup flow, and the live demo), see the /features/autoprint page. The /print-farms landing page covers the broader operational picture for farm operators, including the /features/staggered-start and /features/printer-maintenance features that round out the stack. If you are scaling past a handful of printers, those are the next reads.