
-
1 Equipment requirements
-
2 Set up
Setup steps
Flash SD card with Raspberry Pi Imager
-
Insert SD card into your computer
If your computer has a slot of the large SD card, or a micro SD card slot; insert in this. Otherwise a USB converter is required.
- Download and install Raspberry Pi Imager, then open it
-
Click the "Choose OS" button
- Scroll to, and click "Other specific-purpose OS"
- Click "3D printing"
- Click "OctoPi"
- Click "OctoPi (stable)"
-
Click the "Choose storage" button and click on the inserted SD card
If you have other thumb/flash drives (USB sticks) in your computer, it's a good idea to take these out first, so the wrong device isn't picked.
- Click the "Next" button
-
Flashing settings
-
When it asks for "Use OS customisation", click "Edit settings"
-
Set up Raspberry Pi (SSH) login
- Make sure "Enable SSH" is enabled in the "Services" tab
- Enter a Username and a Password
-
Set up WiFi
- If you use an internet cable (ethernet) for your Raspberry Pi, you can skip this
- Enable "Configure wireless LAN"
- In the "SSID" field, type in your WiFi network name (do it carefully; it's case-sensitive)
- In the "Password" field, enter the password of your WiFi network if it has one
- For the "Wireless LAN country" field, select your country code (not sure what your country code is? Check here)
-
Set up Raspberry Pi (SSH) login
- Click "Save"
-
When it asks for "Use OS customisation", click "Edit settings"
-
Click the "Yes" button (twice, to confirm that you wish to
override the SD card
contents) and wait until it's finished!
While flashing the SD card, the file explorer and some popups might open - don't worry, this is normal and these should just be ignored (and not clicked).
Put the SD card in your Pi, and turn it on
Remove the SD card from your computer, put it in the Raspberry Pi and then plug your Pi into power.
Connect the Raspberry Pi to your Goofoo Tiny+
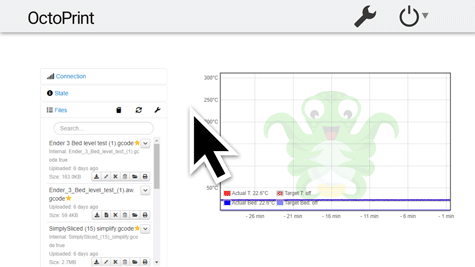
Open up OctoPrint!

Now, all you need to do is give the Pi a couple of minutes to boot up (the older the Pi, the longer it may take), before we try and access the OctoPrint web-UI.
- Wait a couple of minutes for the Pi to boot
-
There are a couple of different ways to access OctoPrint, and it may differ from
setup to setup
-
Go to
http://octopi.local/in your browser - Check your router: Look for the IP address of your OctoPrint instance in your router's settings
- Use a network scanner You can use a free network scanner like Angry IP Scanner (works on Windows, macOS and Linux).
- No luck? Check this OctoPrint help article on how to find the OctoPrint IP.
-
Go to
[Optional] Make OctoPrint smarter with SimplyPrint
- Open OctoPrint in your browser
- Click the Settings icon in the top bar
- Scroll down and click "Plugin Manager"
- Click "Get more" in the plugin manager tab
- Search for and install the "SimplyPrint Cloud" in the plugin manager
- Restart OctoPrint
-
Once OctoPrint is online again, check the top bar for the SimplyPrint setup
code.
Copy this and proceed to the next step to link the printer to your account!
Set up SimplyPrint for OctoPrint
Installing the SimplyPrint plugin
-
Open OctoPrint in your browser
-
Not sure how access OctoPrint?
-
You can likely access it by going to
http://octopi.local/in your browser - Check your router: Look for the IP address of your OctoPrint instance in your router's settings
- Use a network scanner You can use a free network scanner like Angry IP Scanner (works on Windows, macOS and Linux).
- No luck? Check this OctoPrint help article.
-
You can likely access it by going to
-
Not sure how access OctoPrint?
- Click the Settings icon in the top bar
- Scroll down and click "Plugin Manager"
- Click "Get more" in the plugin manager tab
- Search for and install the "SimplyPrint Cloud" in the plugin manager
- Restart OctoPrint
-
Once OctoPrint is online again, check the top bar for the SimplyPrint setup
code.
Copy this and proceed to the next step to link the printer to your account!
That's it! You're all set
You're now ready to connect your printer and start using SimplyPrint.
Create your free account