Setting up SimplyPrint on Creality Hi
Easy steps to connect your Creality Hi 3D printer to SimplyPrint.

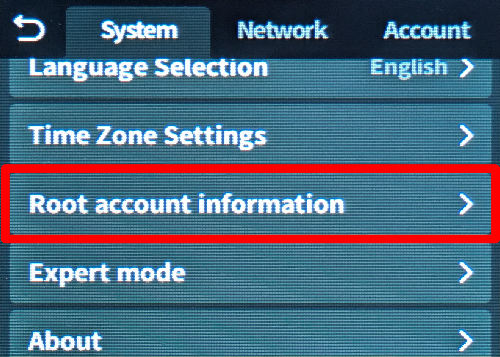
Your Creality Hi requires enabling "root access" to connect to SimplyPrint.
Don't let the technical name worry you — this is usually as simple as navigating to a setting on your printer's screen and checking a box. You'll also use "SSH" to run a few commands.
Think of it like unlocking "administrator mode" on your printer. It gives you (and SimplyPrint) the ability to add features and make changes that the standard interface doesn't allow.
Your printer manufacturer has locked down certain features. By enabling root access, you're giving yourself permission to use your printer to its full potential.
Not really! In most cases, the manufacturer has provided this option themselves — it's just tucked away in the settings. You're using a feature they built in.
We simply enable our component in the printer's existing software — we don't install packages or make invasive changes. You can usually factory reset to undo everything.
Some manufacturers mention that enabling root access may affect your warranty. The risk is low — we haven't had a single known case of a SimplyPrint user being denied warranty service because of this.
But it's your call.
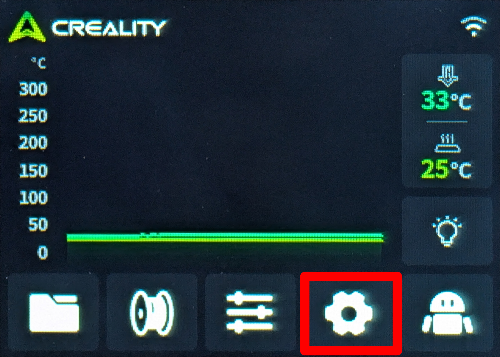
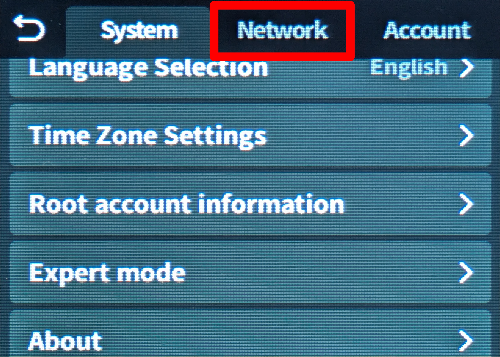
We'll show you exactly where to find this setting and what commands to run.
In this guide we will go through:


Yes, this is the annoying technical part. We're sorry — we've tried everything to avoid it, but your device simply doesn't give us another option.
But here's the thing: it's easier than it looks. You're just going to copy-paste a few commands. That's it. Pick your computer type below and follow the steps — we'll walk you through every click.
192.168.1.42).
Do not include http://, slashes, or port numbers.
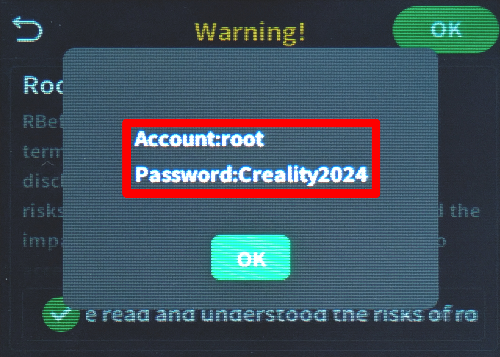
ssh username@ip-address
ssh [email protected]
yes and press Enter
ssh username@ip-address
ssh [email protected]
yes and press Enter
ssh username@ip-address
ssh [email protected]
yes and press Enter
ssh username@ip-address
ssh [email protected]
yes and press Enter
ssh-keygen -R <ip-address>
While there are SSH apps available for Android and iOS, we recommend using a computer for SSH connections. A proper keyboard and screen make typing commands much easier.
ssh root@[IP_ADDRESS]
For example; ssh [email protected]
python3 -c "import urllib.request;print(urllib.request.urlopen('https://download.simplyprint.io/creality/hi/hi-setup.sh').read().decode())" | sh
/usr/data/moonraker
or /data/moonraker. It then adds the SimplyPrint configuration ([simplyprint]) to the file and restarts Moonraker.
http://[IP_ADDRESS]:4408 to access the Fluidd panel hosted by your Creality Hi. And that's it! Your Creality Hi is now running Klipper with SimplyPrint enabled.
Due to limitations in Creality's firmware, the following features are not available:
Thousands complete this setup every week. Follow each step carefully - most issues come from skipping ahead.
You're now ready to connect your printer and start using SimplyPrint.
Create your free account