Setting up SimplyPrint on FLSUN T1 Max
Easy steps to connect your FLSUN T1 Max 3D printer to SimplyPrint.
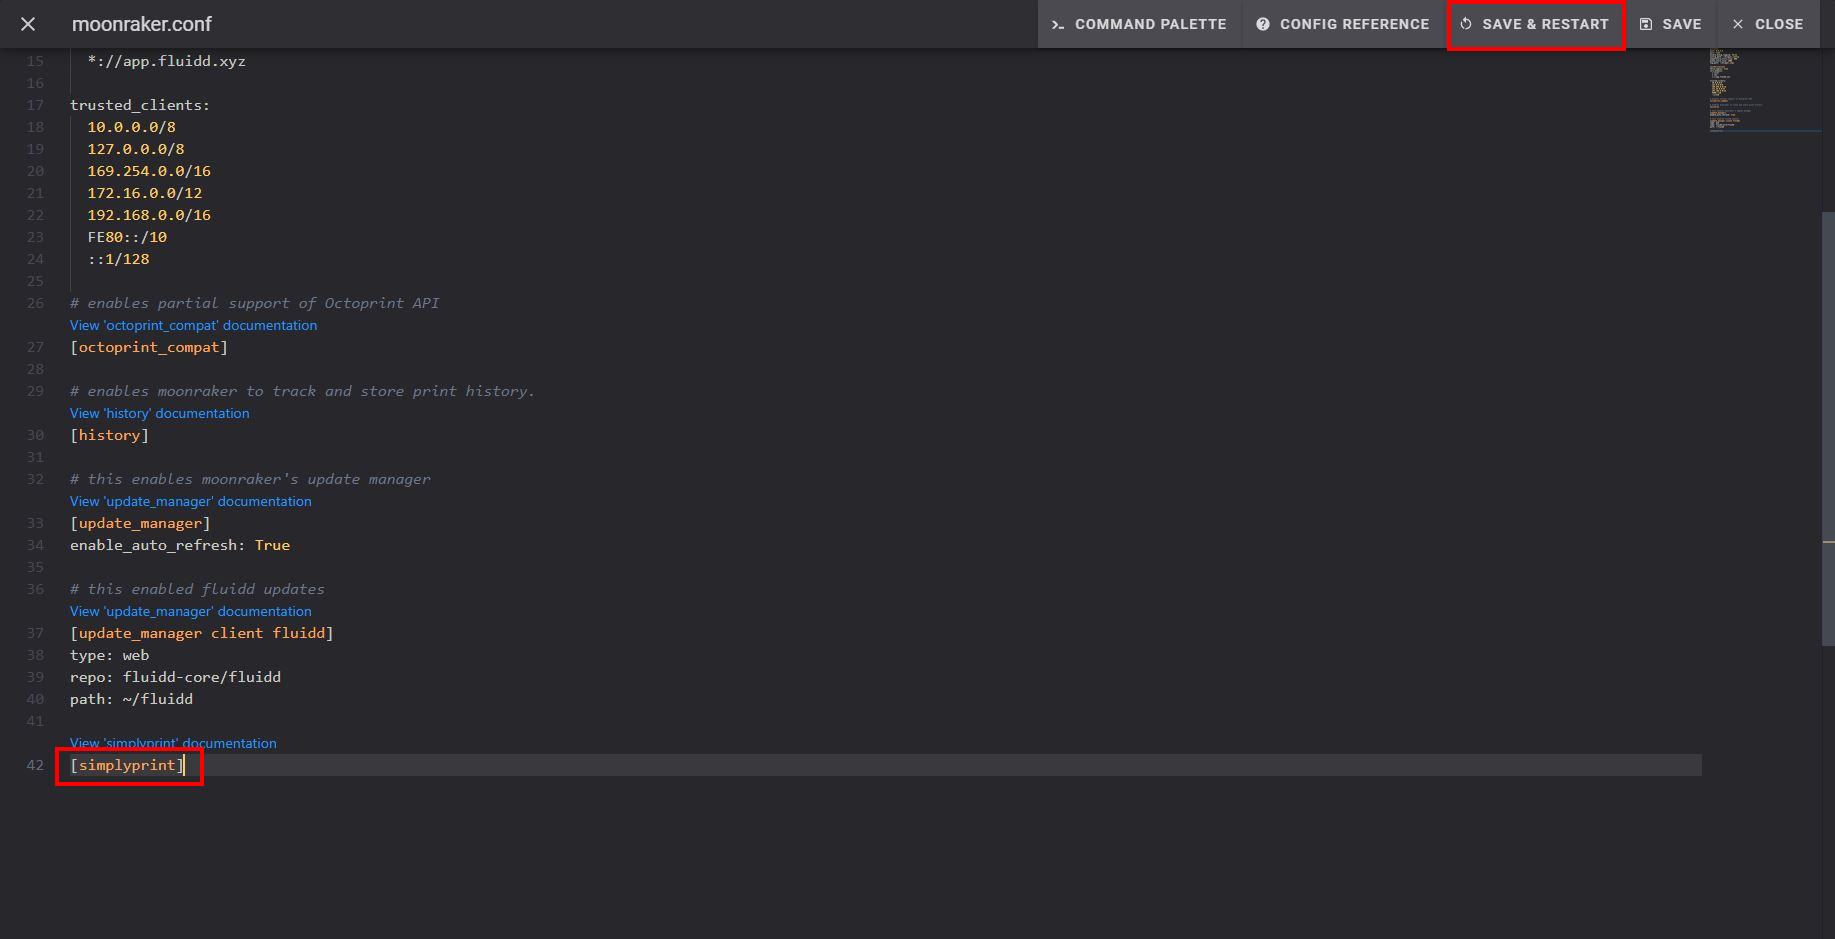
[simplyprint] to the moonraker.conf config filemoonraker.conf file
moonraker.conf, user.moonraker.conf, moonraker.generated.config, or a custom filename. If moonraker.conf isn't present, edit whichever file Moonraker is actually loading on your printer.[simplyprint] to the bottom of the file (with an empty line above it)
After saving and restarting, your printer should appear automatically in SimplyPrint!
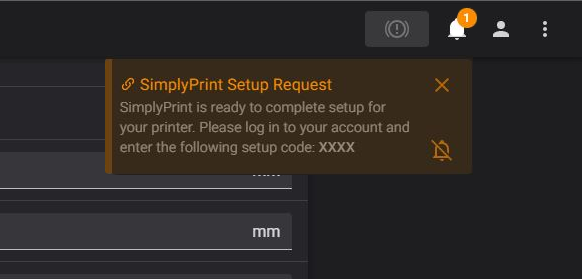
If your printer doesn't appear in Pending Printers:
This can happen if you're not on the same network as your printer (different outgoing IP). In this case, use the setup code:
Still having trouble? See our guide: Printer in setup isn't detected / can't find setup code.
Thousands complete this setup every week. Follow each step carefully - most issues come from skipping ahead.
You're now ready to connect your printer and start using SimplyPrint.
Create your free account