Creality Ender-3 V3 Plus पर SimplyPrint सेटअप
अपने Creality Ender-3 V3 Plus 3D प्रिंटर को SimplyPrint से कनेक्ट करने के आसान चरण।

[simplyprint] to the moonraker.conf config filemoonraker.conf file
moonraker.conf, user.moonraker.conf, moonraker.generated.config, or a custom filename. If moonraker.conf isn't present, edit whichever file Moonraker is actually loading on your printer.[simplyprint] जोड़ें (उसके ऊपर एक खाली लाइन के साथ)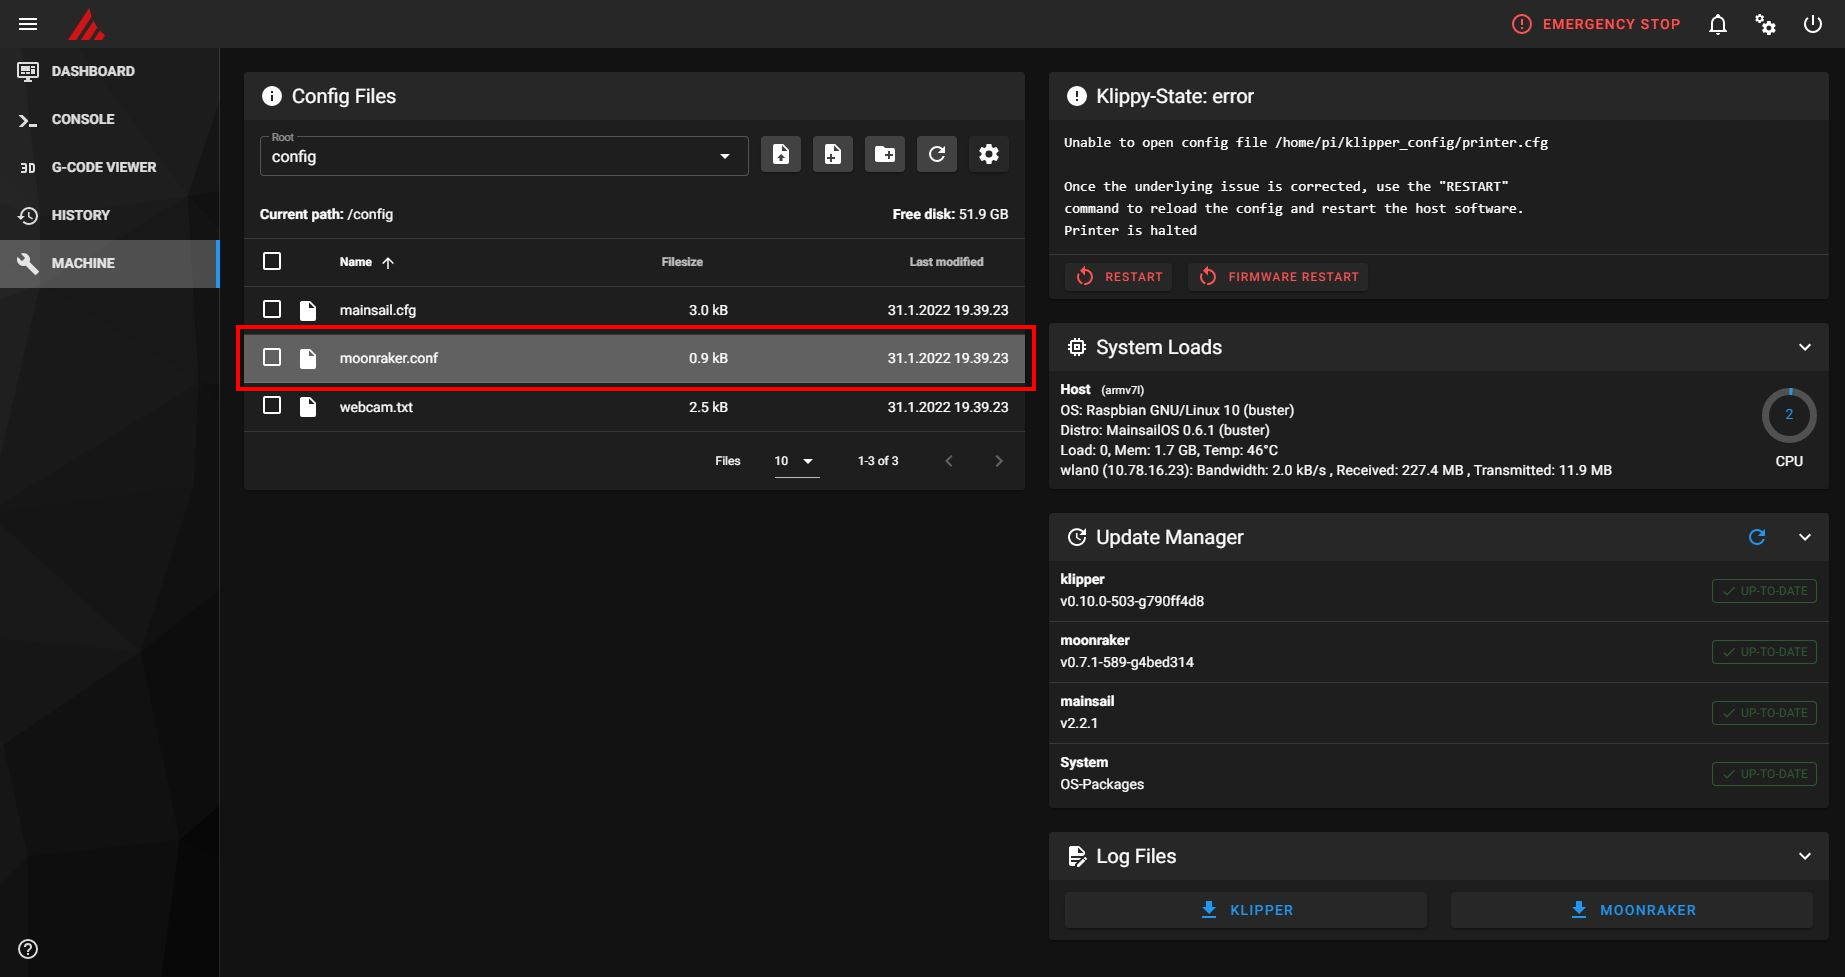
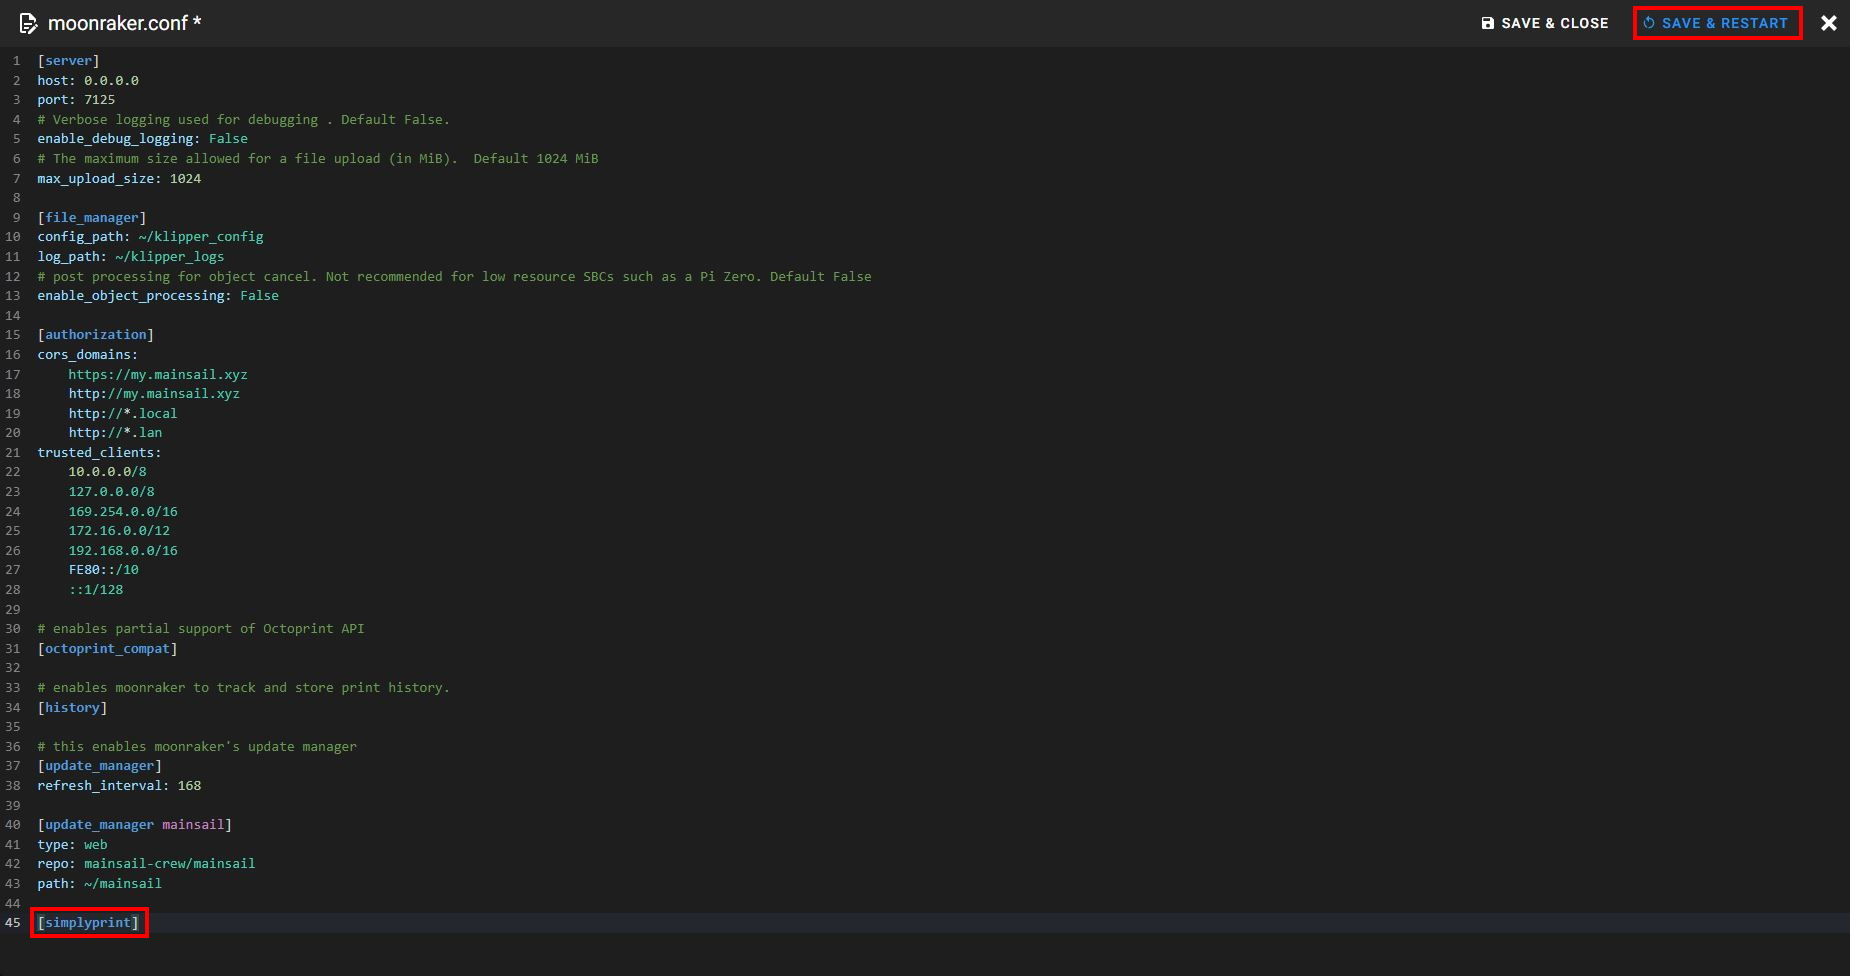
सेव और रीस्टार्ट करने के बाद, आपका प्रिंटर SimplyPrint में अपने आप दिखना चाहिए!
अगर आपका प्रिंटर पेंडिंग प्रिंटर में दिखाई नहीं देता:
ऐसा तब हो सकता है जब आप अपने प्रिंटर के साथ एक ही नेटवर्क पर न हों (अलग आउटगोइंग IP)। ऐसे में, सेटअप कोड इस्तेमाल करें:
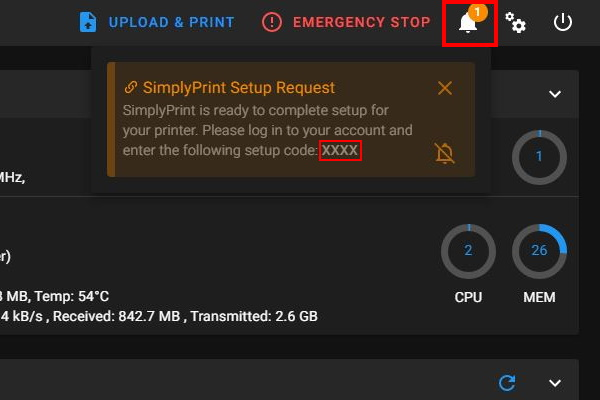
अब भी दिक्कत आ रही है? हमारी गाइड देखें: सेटअप में प्रिंटर नहीं दिख रहा / सेटअप कोड नहीं मिल रहा।
हज़ारों लोग हर हफ़्ते यह सेटअप पूरा करते हैं। हर स्टेप ध्यान से फॉलो करें, ज़्यादातर दिक्कतें आगे के स्टेप छोड़ देने से आती हैं।
अब आप अपना प्रिंटर जोड़ने और SimplyPrint इस्तेमाल शुरू करने के लिए तैयार हैं।
अपना फ्री खाता बनाएं