在Artillery 3D Sidewinder X3 Pro上设置 SimplyPrint:Creality Sonic Pad方式

此打印机采用Creality Sonic Pad设置。按照步骤将您的Artillery 3D Sidewinder X3 Pro 3D 打印机连接到 SimplyPrint。

Artillery 3D Sidewinder X3 Pro image
  • 1 正在准备 Sonic Pad
  • 2 Fluidd 设置

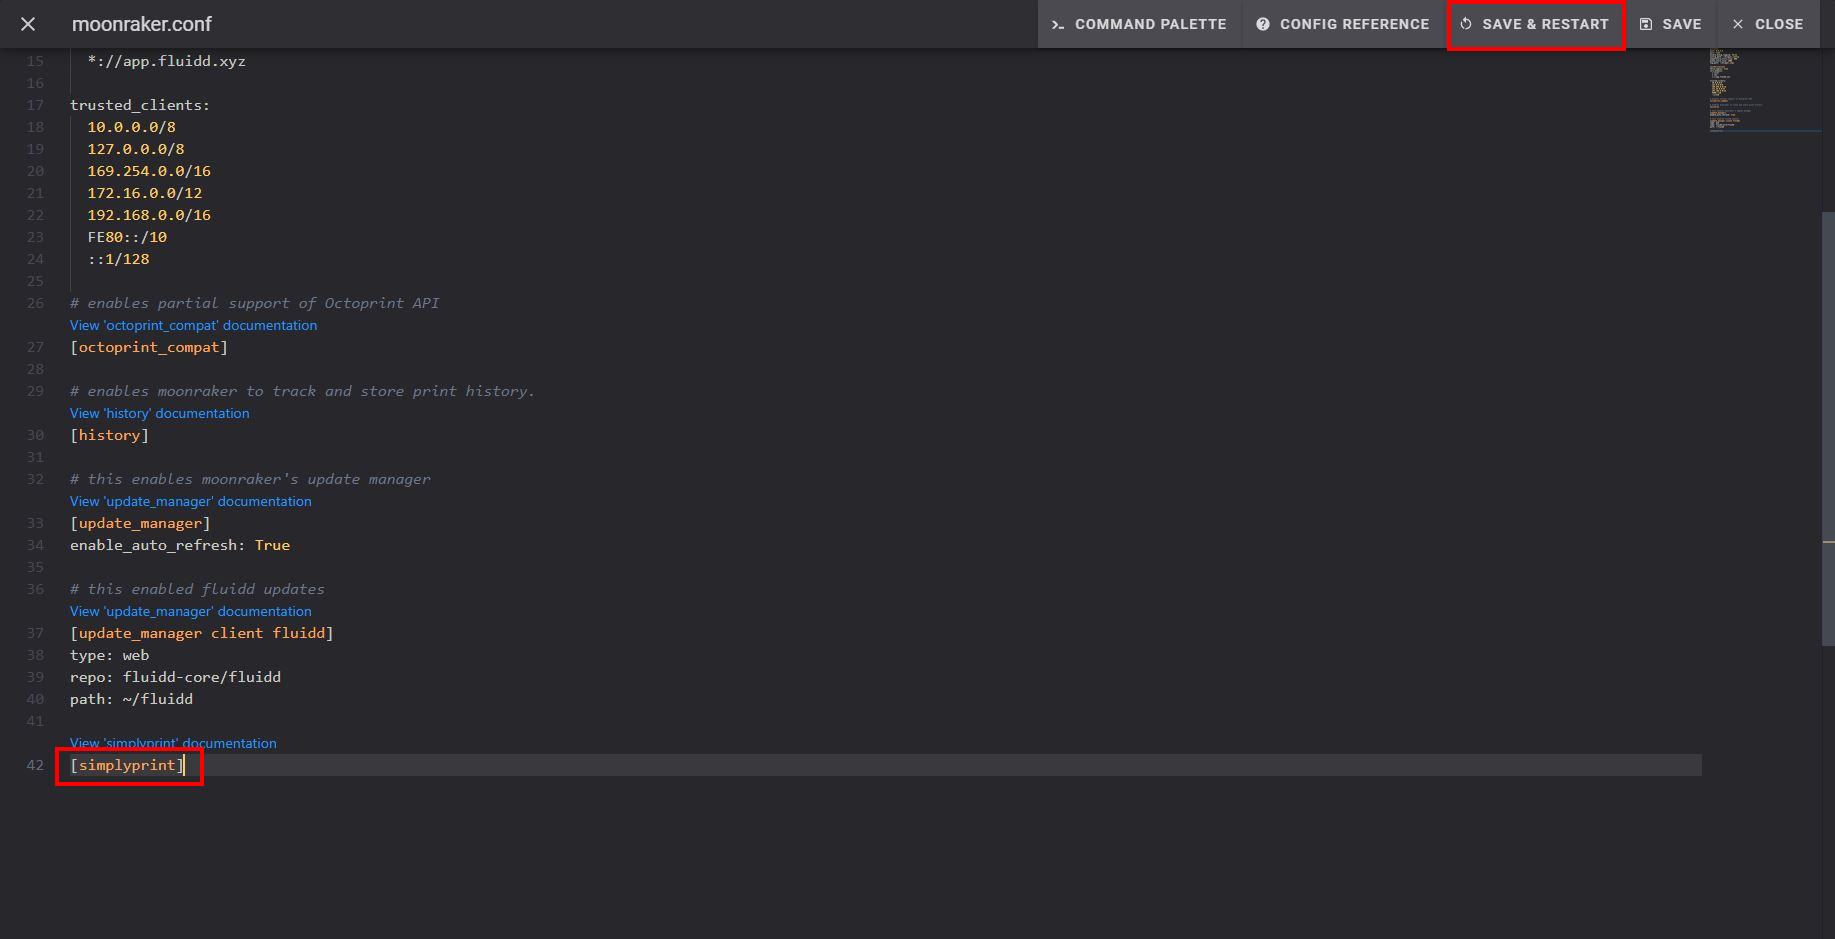
Add [simplyprint] to the moonraker.conf config file

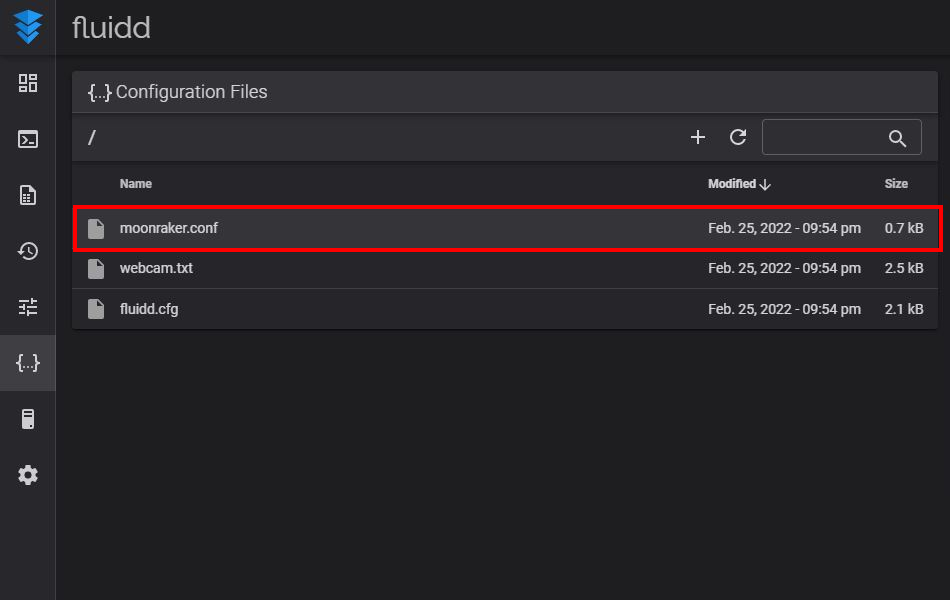
  1. 前往“配置”选项卡
  2. Under "Configuration Files", click on the moonraker.conf file
    • NOTE: depending on your printer, the Moonraker config file may go by a different name. Common names are moonraker.conf, user.moonraker.conf, moonraker.generated.config, or a custom filename. If moonraker.conf isn't present, edit whichever file Moonraker is actually loading on your printer.
  3. [simplyprint] 添加到文件末尾(上方留一个空行)
  4. 点击"保存并重启"按钮
moonraker.conf config file Edit moonraker.conf

最后,将您的打印机关联到 SimplyPrint

保存并重启后,您的打印机应该会自动出现在 SimplyPrint 中!

  1. 前往SimplyPrint.io,点击添加打印机
  2. 查看待处理打印机,您的打印机通常会自动出现在其中
  3. 点击添加,完成!

如果您的打印机未出现在待处理打印机中:

如果您与打印机不在同一网络下(出口IP不同),可能会出现此情况。此时请使用设置代码:
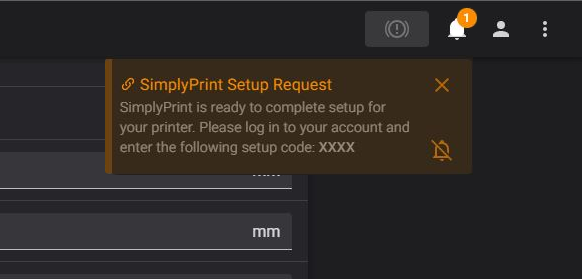
  1. 在顶部栏的“公告”铃铛(🔔)图标中,找到“SimplyPrint设置请求”消息
SimplyPrint setup code
  1. 复制设置代码,并将其粘贴到SimplyPrint中的添加打印机

仍然遇到问题? 请查看我们的指南:设置过程中未检测到打印机/找不到设置代码

就这样!一切都已准备就绪

您现在可以连接打印机并开始使用SimplyPrint了。

创建您的免费账户
返回